Renesas
Renesas is an official partner of LVGL. Therefore, LVGL contains built-in support for Dave2D (the GPU of Renesas) and we also maintain ready-to-use Renesas projects.
Dave2D
Dave2D is capable of accelerating most of the drawing operations of LVGL:
Rectangle drawing, even with gradients
Image drawing, scaling, and rotation
Letter drawing
Triangle drawing
Line drawing
As Dave2D works in the background, the CPU is free for other tasks. In practice, during rendering, Dave2D can reduce the CPU usage by half or to one-third, depending on the application.
GLCDC
GLCDC is a multi-stage graphics output peripheral available in several Renesas MCUs. It is able to drive LCD panels via a highly configurable RGB interface.
More info can be found at the driver's page.
Supported boards
EK-RA8D1 |
EK-RA6M3G |
RX72N Envision Kit |
|
CPU |
480MHz, Arm Cortex-M85 core |
120MHz, Arm Cortex-M4 core |
240MHz, Renesas RXv3 core |
Memory |
1MB internal, 64MB external SDRAM
2MB internal, 64MB External Octo-SPI Flash
|
640kB internal SRAM
2MB internal, 32MB external QSPI Flash
|
1MB internal SRAM
4MB internal, 32MB external QSPI Flash
|
Display |
4.5”
480x854
2-lane MIPI
|
4.3”
480x272
Parallel RGB565
|
4.3”
480x272
Parallel RGB565
|
Board video |
|||
Links |
Get started with the Renesas ecosystem
RA Family
The official IDE of Renesas is called e² studio. As it's Eclipse-based, it runs on Windows, Linux, and Mac as well. The RA family requires the latest version with FSP 5.3. It can be downloaded here.
JLink is used for debugging, it can be downloaded here.
Clone the ready-to-use repository for your selected board:
git clone https://github.com/lvgl/lv_port_renesas_ek-ra8d1.git --recurse-submodules
Downloading the .zip from GitHub doesn't work as it doesn't download the submodules.
Open e² studio, go to
File->Import projectand selectGeneral/Existing projects into workspaceBrowse the cloned folder and press
Finish.Double click on
configuration.xml. This will activate the Configuration Window.Renesas' Flexible Software Package (FSP) incudes BSP and HAL layer support extended with multiple RTOS variants and other middleware stacks. The components will be available via code generation, including the entry point of "main.c".
Press
Generate Project Contentin the top right corner.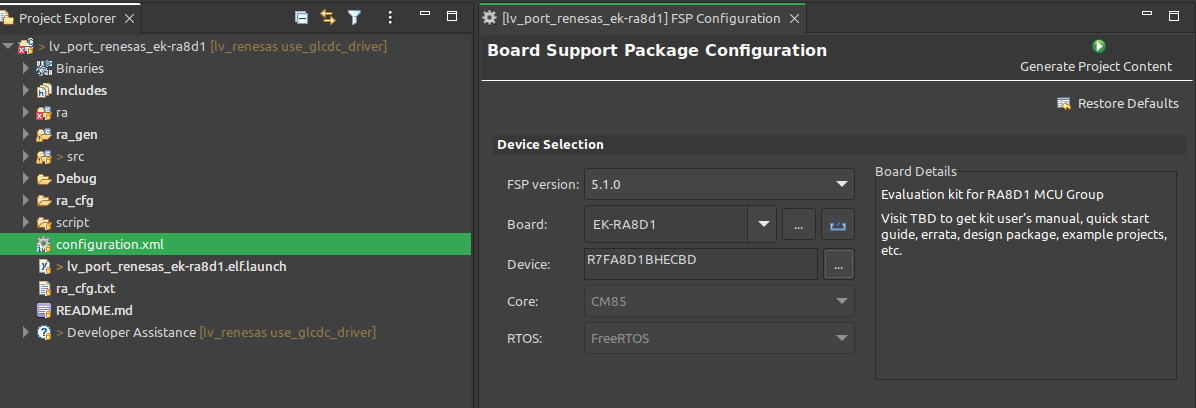
Build the project by pressing
Ctrl+Alt+BClick the Debug button (
 ). If prompted with Debug Configurations, on the Debugger tab select the
 J-Link ARMas Debug hardware and the proper IC as Target Device:R7FA8D1BHfor EK-RA8D1
R7FA6M3AHfor EK-RA6M3G
Note
On EK-RA8D1 boards, the SW1 DIP switch (middle of the board) 7 should be ON, all others are OFF.
RX Family
The official IDE of Renesas is called e² studio. As it's Eclipse-based, it runs on Windows, Linux, and Mac as well. It can be downloaded here.
Download and install the required driver for the debugger
for Windows: 64 bit here and 32 bit here
for Linux: here
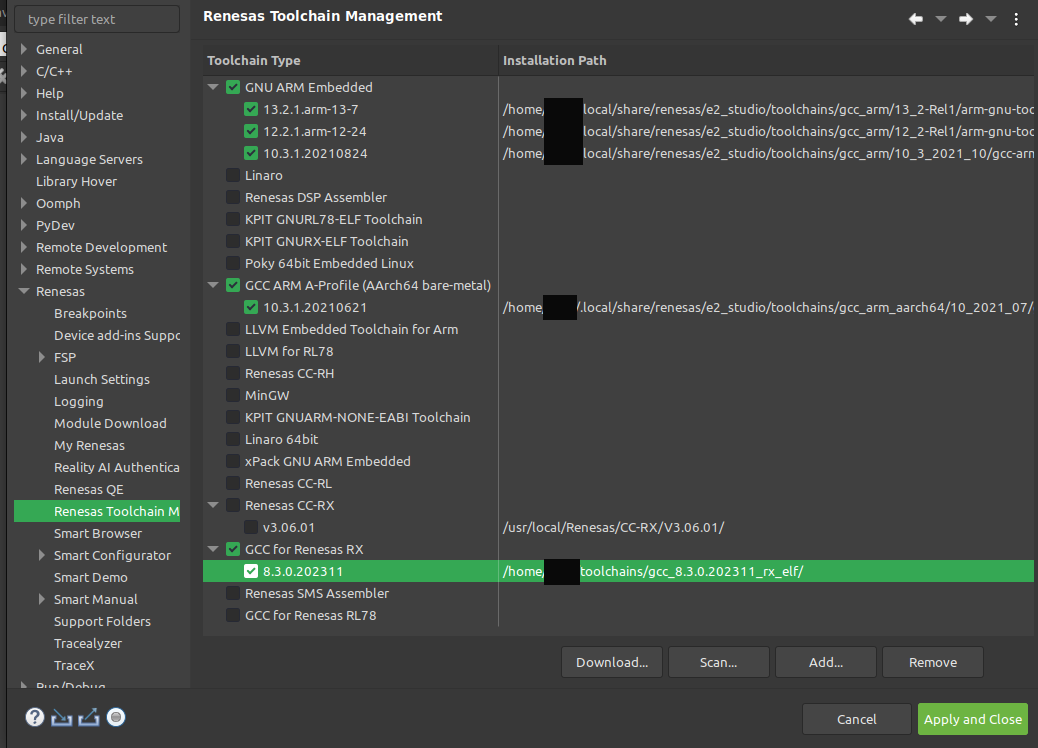
RX72 requires an external compiler for the RXv3 core. A free and open-source version is available here after a registration.
The compiler must be activated in e² studio:
Go to go to
Help->Add Renesas ToolchainsPress the
Add...buttonBrowse the installation folder of the toolchain
Clone the ready-to-use lv_port_renesas_rx72n-envision-kit repository:
git clone https://github.com/lvgl/lv_port_renesas_rx72n-envision-kit.git --recurse-submodules
Downloading the .zip from GitHub doesn't work as it doesn't download the submodules.
Open e² studio, go to
File->Import projectand selectGeneral/Existing projects into workspaceSelect the cloned folder and press
Finish.Double click on
RX72N_EnVision_LVGL.scfg. This will activate the Configuration Window.Renesas' Smart Configurator (SMC) incudes BSP and HAL layer support extended with multiple RTOS variants and other middleware stacks. The components will be available via code generation, including the entry point of the application.
Press
Generate Codein the top right corner.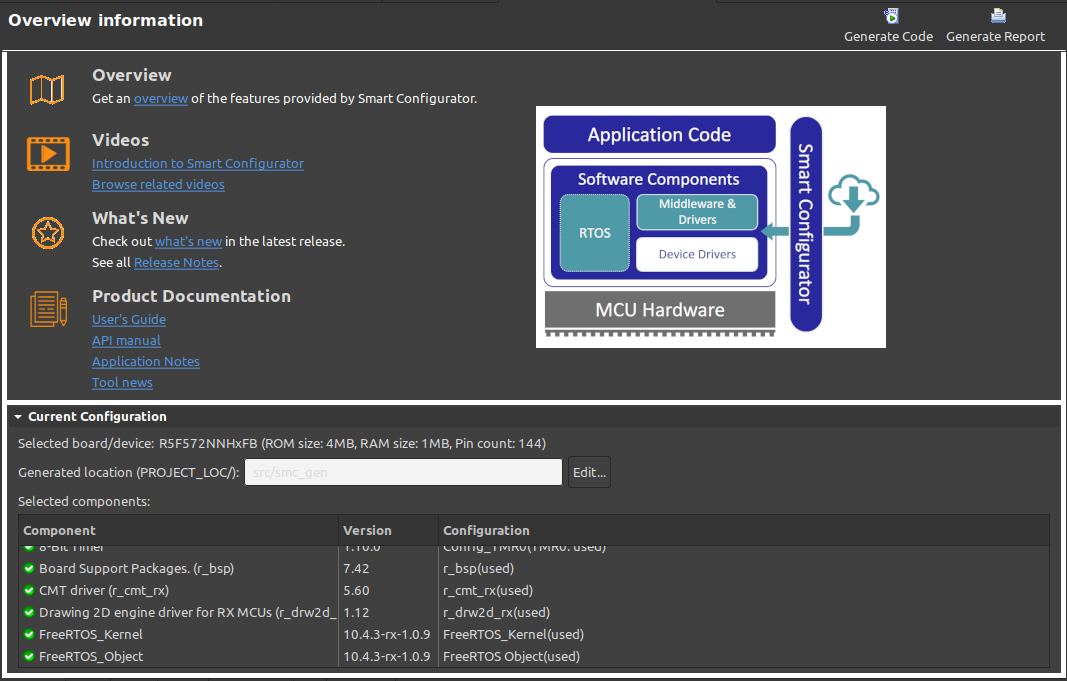
Build the project by pressing
Ctrl+Alt+BClick the Debug button (
). If prompted with Debug Configurations, on the Debugger tab select the E2 Liteas Debug hardware andR5F572NNas Target Device: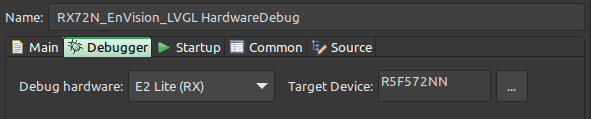
Note
Make sure that both channels of SW1 DIP switch (next to ECN1) are OFF.
Modify the project
Open a demo
The entry point of the main task is contained in src/LVGL_thread_entry.c in all 3 projects.
You can disable the LVGL demos (or just comment them out) and call some lv_example_...() functions, or add your custom code.
Configuration
src/lv_conf.h contains the most important settings for LVGL. Namely:
LV_COLOR_DEPTHto set LVGL's default color depthLV_MEM_SIZE toset the maximum RAM available for LVGLLV_USE_DAVE2Dto enable the GPU
Hardware and software components can be modified in a visual way using the Configuration Window.
Support
In case of any problems or questions open an issue in the corresponding repository.